
The new WordPress editor, Gutenberg, represents a much easier, smoother, intitutive way of using WordPress—you just need to get over a little learning curve first.
The heart of the editor, and its biggest departure from the old one, is its use of “blocks.” If you can master all the little menus and buttons for blocks that are tucked away all over Gutenberg, you’ll be able to use blocks to do really sophisticated stuff, all without learning a single line of code.
If there are any flaws with the basics of block creation, it’s that there are too many ways to create blocks and change their type. Play around with the methods below and you’ll find a system that works best for you.
I. Creating Your Blocks
In the new editor, each piece of content in your post goes into its own “block,” and each block has a type: Paragraph blocks, Title blocks, Image blocks, YouTube embed blocks, etc. The editor comes with a ton of pre-made blocks available, and each one is already formatted for you: “Column” blocks have the columns all set up, “Recent Posts” blocks will automatically populate with your recent posts, and so on. Essentially, if you can make it in a Word doc, Gutenberg can help you make it work on your site.
Regardless of what type of block you want to use, the first step will be creating it. There a few ways to do that.
Create a block, Option 1. Pressing “Enter”
Self-explanatory. Create your new post, click in the editor, and start typing. When you’re ready to create the next block, just hit your Enter key: a new Paragraph block will automatically be created for you. Easy!
Create a block, Option 2. The uppermost menu bar
Maybe you don’t want a Paragraph block, so you need a way to create a block of a different type.
At the top of your editor screen, you should have a toolbar with an Undo arrow, a Redo arrow, and a little plus sign.
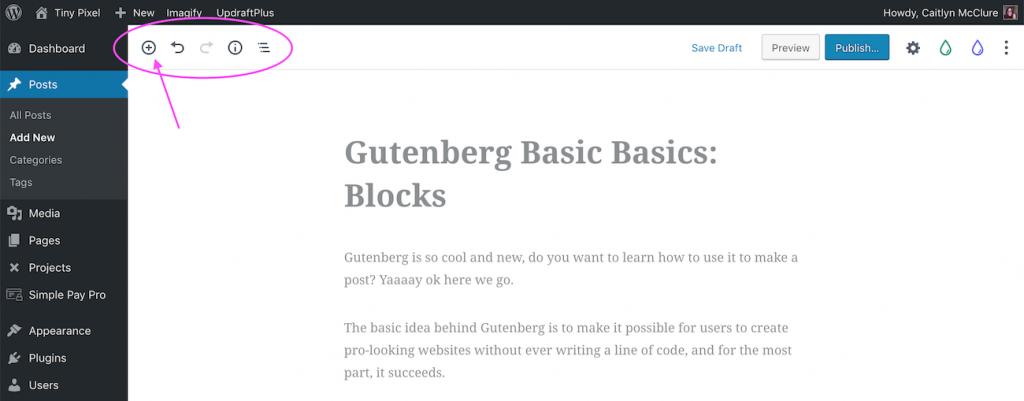
Click that plus sign, and a menu will pop up with all the different kinds of blocks you can create with it.
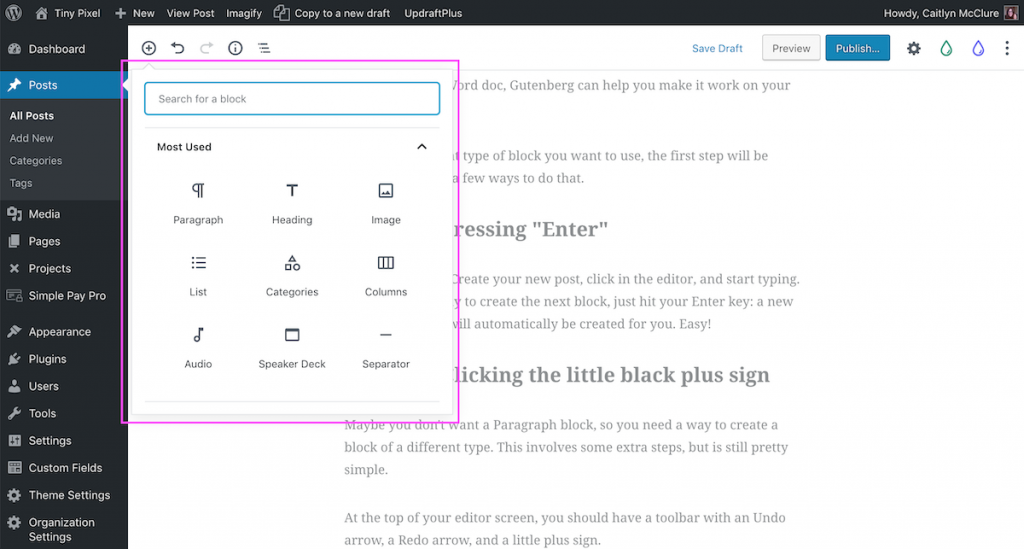
Select one and it will appear below your most recent block. Boom!
Create a block, Option 3. Within the document body
Maybe you want to insert a new block above a block you just made.
Hover your mouse over that block above which you’d like your new block to appear. A blue outline should appear, with a blue plus sign on top.
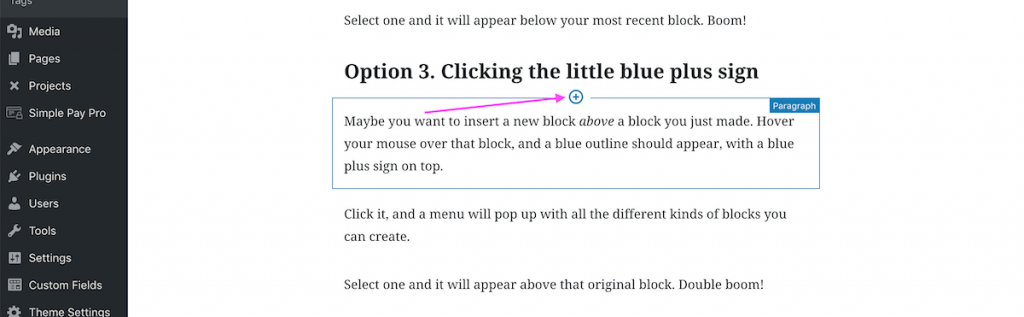
Click it, and a menu will pop up with all the different kinds of blocks you can create.
Select one and it will appear above that original block. Double boom!
II. Selecting and Changing Your Block Types
In our first section, we saw two ways to get at the menu of block types when creating a new block. There are a few more you should know about; one of them is pretty hidden, but also extremely useful when you’re first starting out, so don’t sleep on it.
Changing block type, Option 1. Common block types within the document body
This will only work if you’re on the last block of the page and you’re inserting a block below it; you cannot use this option to insert blocks above other blocks.
When you have at least one block in place, and you’re ready for the next one, hit Enter.
Then, hover your mouse in the general region of the block you just made.
A menu will appear: on the left, you’ll see a little gray plus sign. On the right, you’ll see symbols for three different block types: Header (although the symbol is a “T” for “Title”), Image, and List.
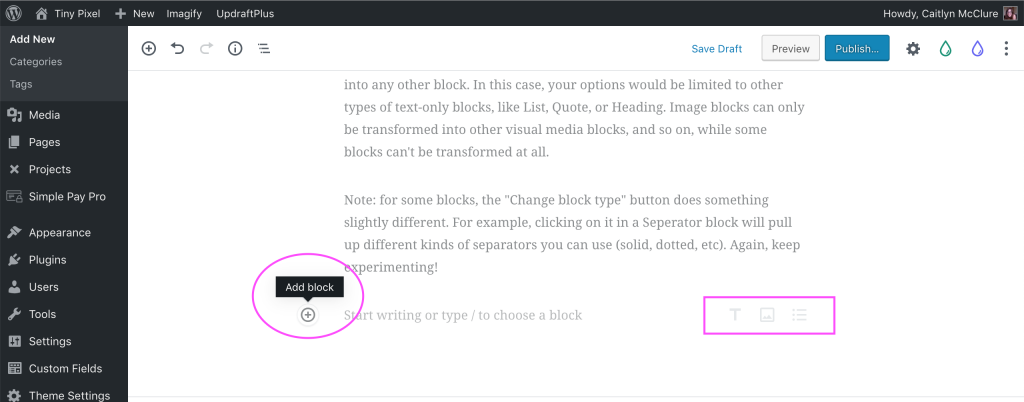
From here, you can either click the plus sign to get that list of available common block types, or just click one of the three symbols on the right to automatically add a block of that type.
Option 2: Get the entire block menu within the body of each block
This one might make you feel pretty cool if you’re not used to using keyboard commands (as opposed to mouse clicks).
You start just like Option 1: when you’re ready for your new block, hit Enter in the block you just finished. But this time, after you hit Enter, type a forward slash (this one: /).
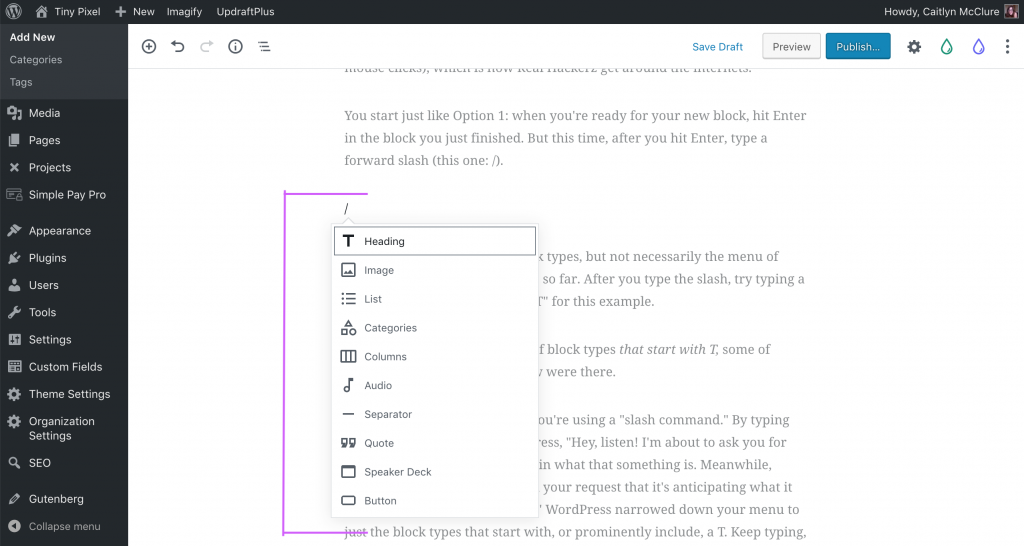
What pops up is a menu of block types, but not necessarily the menu of common block types we’ve seen so far. After you type the slash, try typing a letter, any letter: we’ll go with “T” for this example.
Ooooo. What comes up is a list of block types that start with T, or prominently feature a T, some of which you probably didn’t know were there (“Heading” will pop up here too, because it’s another way of saying “Title”).
What’s happening here is that you’re using a “slash command.” By typing that slash, you’re telling WordPress, “Hey, listen! I’m about to ask you for something.” Then you’re typing in what that something is.
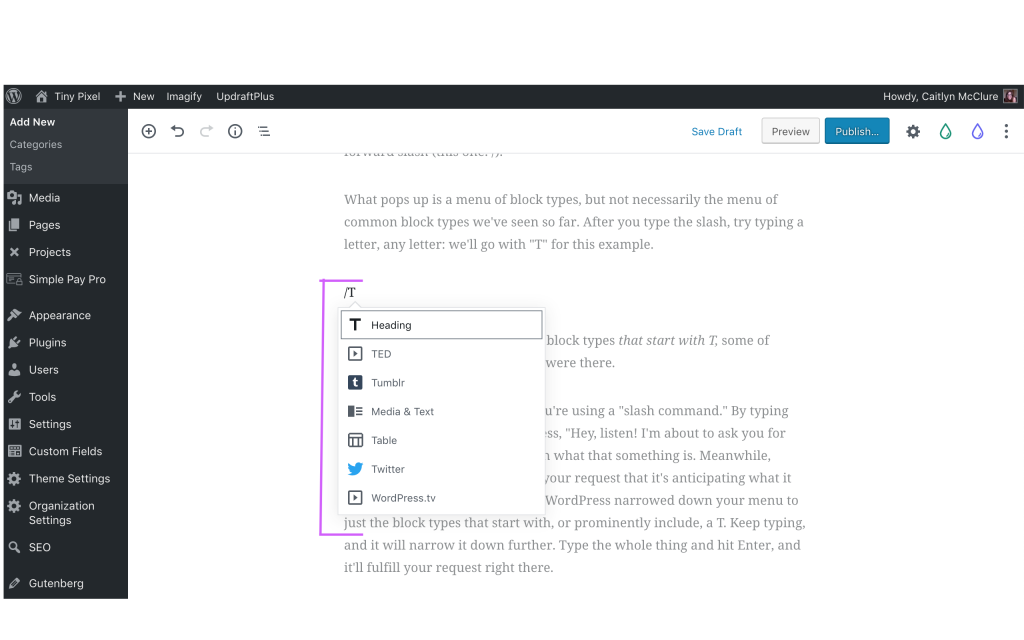
Meanwhile, WordPress is so excited to fulfill your request (really stretching this metaphor here) that it’s anticipating what it will be: when you typed that “T,” WordPress narrowed down your menu to just the block types that start with, or prominently include, a T.
Keep typing, and it will narrow it down further. Type the whole thing and hit Enter, and it’ll fulfill your request right there.
So for example, if you type “/list,” then hit Enter, you’ll create a List block, no mouse clicks required.
The other cool thing about the slash command in this instance is that it’s a great way to see the many, many types of blocks that are hidden away in Gutenberg: just type random first letters and see what happens. It’s not exactly elegant, but it’s kinda fun.
Changing block type, Option 3: the “Change block type” button
Say you have a long quote that you want to highlight in your post, so you’re going to use a Quote block to put it in.
You could go with one of the two options above and just create a new Quote block. But maybe you already put the quote in a Paragraph block, and you don’t want to delete it and start over.
What you need is the “Change block type” button.
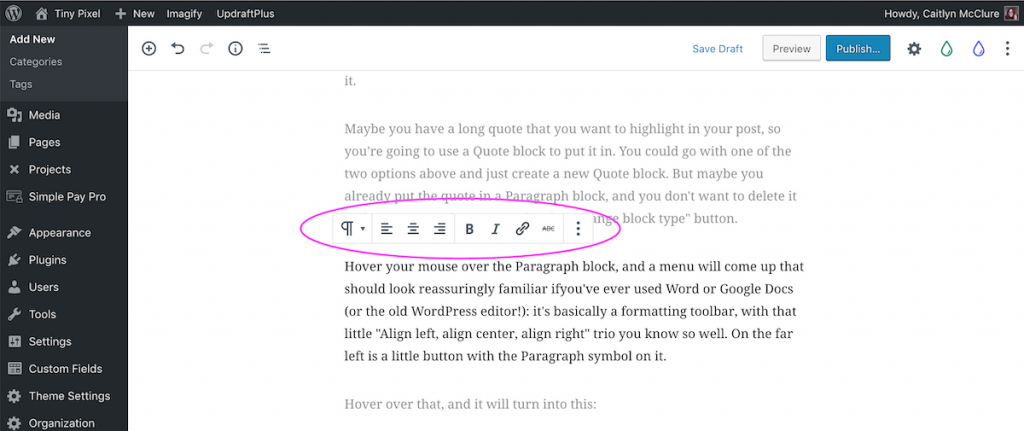
Hover your mouse over the Paragraph block, and a menu will come up.
The menu should look reassuringly familiar ifyou’ve ever used Word or Google Docs (or the old WordPress editor!): it’s basically a formatting toolbar, with that little “Align left, align center, align right” trio you know so well.
On the far left is a little button with the Paragraph symbol on it.
Hover over that Paragraph symbol, and it will turn into the “Change block type” symbol, like this:
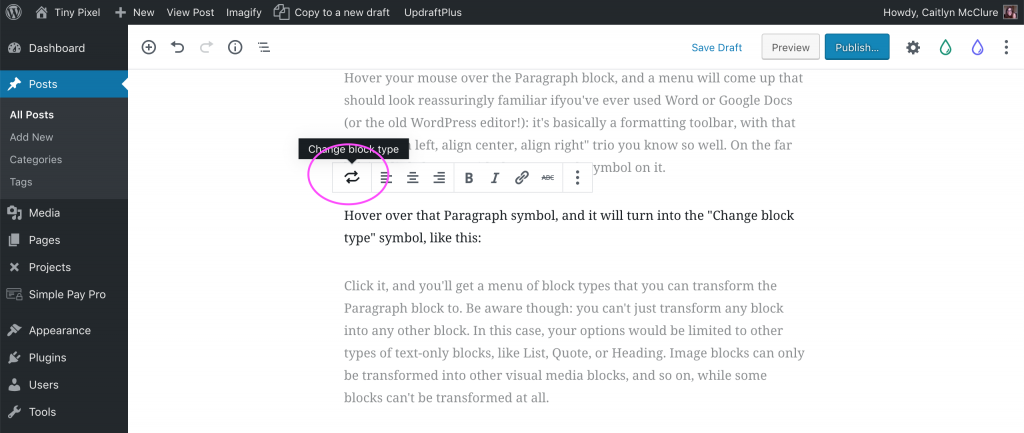
Click it, and you’ll get a menu of block types that you can transform the Paragraph block to.
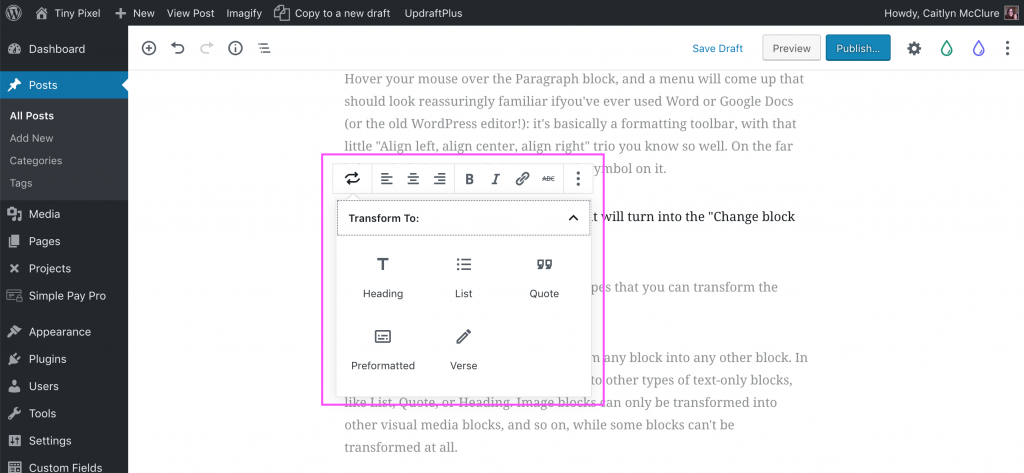
Be aware though: you can’t just transform any block into any other block. In this case, your options would be limited to other types of text-only blocks, like List, Quote, or Heading. Image blocks can only be transformed into other visual media blocks, and so on, while some blocks can’t be transformed at all.
Note: for some blocks, the “Change block type” button does something slightly different. For example, clicking on it in a Seperator block will pull up different kinds of separators you can use (solid, dotted, etc). Again, keep experimenting! No wrong moves!
III. Moving Your Blocks
The Gutenberg developers have used the phrase “drag and drop,” and while it’s not exactly the Wix experience you might be thinking of, it is indeed pretty easy to change the order of blocks on a page.
To shift a block around, just click anywhere in the block to select it, then move your cursor over the left hand side of the box. Three small icons will appear: an Up arrow, a Down arrow, and six little dots forming a rectangle.
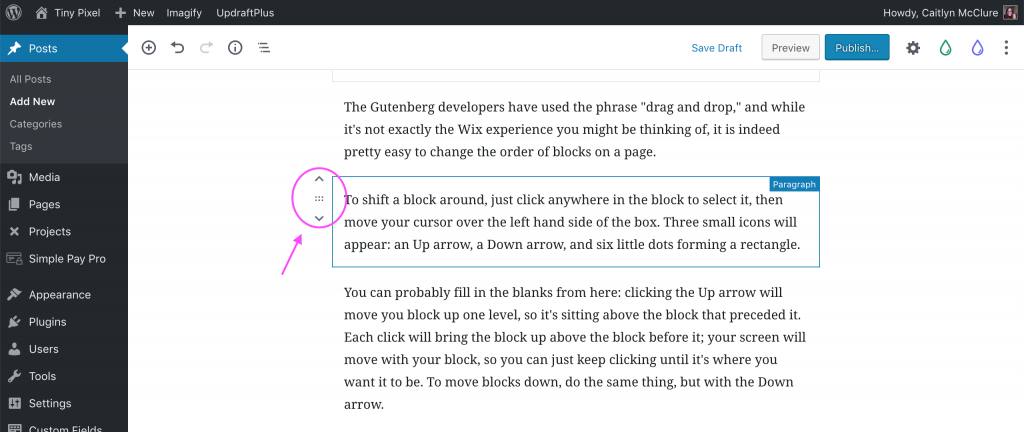
You can probably fill in the blanks from here: clicking the Up arrow will move you block up one level, so it’s sitting above the block that preceded it. Each click will bring the block up above the block before it; your screen will move with your block, so you can just keep clicking until it’s where you want it to be.
To move blocks down, do the same thing, but with the Down arrow.
If you’re not totally sure where you want the block to go—or if you’re trying to move one block into another block, which is only possible with some block types that we’ll cover in a later article—that little dotted rectangle is what you want. Just click it and start dragging until the block is where you want it.
IV. Next Up
That’s pretty much it for your first lesson! You now know how to create blocks, set their type, change their type, and move them around the page.
Remember: the new editor is for you, the non-programmer. So don’t be frustrated with yourself if you’re not getting this right away, and don’t be afraid to take risks and experiment—you’re not going to break anything by pubishing a wonky post. You got this!